Online Protractor Tool Online Protractor - #1 Digital Angle Tool for Images & Screen
Experience the most versatile online protractor designed for precision. Whether you need to measure angles on an uploaded image, use your webcam for real-world objects, or overlay a transparent scale on your screen, our tool provides 100% accuracy. No downloads or installations required, just a fast, browser-based digital protractor for engineers, designers, and students needing instant degree measurements.
Image, screenshot, and camera ready180-degree and 360-degree angle modesPNG, PDF, CSV, Excel, and JSON exports
What is it? What is an Online Protractor Tool?
An Online Protractor Tool is a digital angle reader that sits right on top of your image, screenshot, or live camera view. Instead of estimating by eye, you place the vertex, rotate or resize the protractor, and let the canvas create measurement points that stay tied to the image.
If you want a deeper workflow breakdown, the Tutorial page and the photo measurement guide both show how to turn a rough visual angle into something you can trust a little more.
Online Protractor Tool works across everyday inputs
- Phone photos and camera captures from site visits
- Screenshots from design reviews and QA checks
- Geometry diagrams, classroom worksheets, and whiteboard notes
- Cutting plans, craft layouts, and quick DIY reference shots
Controls you can actually use while measuring
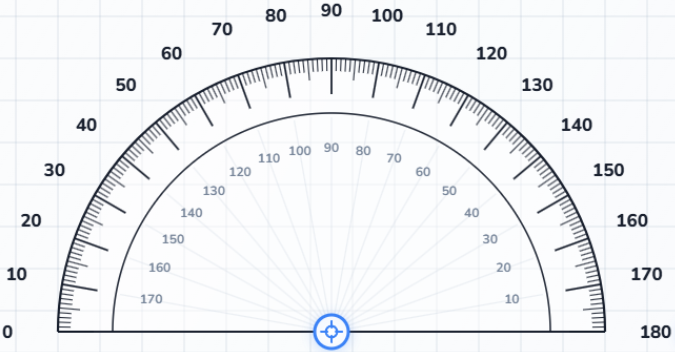
- Switch between 180-degree and 360-degree modes depending on the angle type
- Click the canvas to create auto-recorded measurement points
- Drag the center handle to move the protractor
- Drag the edge or shortcuts to rotate and resize the tool
Exports that stay useful after the measurement
- Download a clean PNG or PDF snapshot of the measured workspace
- Send CSV, Excel, or JSON data into reports and spreadsheets
- Keep multiple auto-recorded points from a single image
- Share a repeatable reading instead of a rough estimate
Features Features of Online Protractor Tool
This version of the Online Protractor Tool focuses on the features people use most often: loading a background fast, lining the angle up clearly, auto-recording points, and exporting the result without switching tools halfway through the job.
Upload, paste, or drag files in quickly
Start measuring the moment a screenshot or photo is ready. The workspace accepts file uploads, drag-and-drop, and pasted clipboard images.
Camera-ready measurements
Need a live reference? Turn on the camera feed, place the vertex, and read the angle without leaving the browser tab.
Snap steps for cleaner readings
Switch snapping on when you want stable 1, 5, 10, 15, or 30 degree movements instead of small shaky adjustments.
Points are recorded automatically
Click to create a point and the Measurements panel updates right away. You can focus, drag, or delete each point without a separate save action.
Export without extra software
Download a PNG or PDF for visual proof, or export the measurement list as CSV, Excel, or JSON when you need something reusable.
Responsive, touch-friendly layout
The canvas and panels stack cleanly on small screens, so the Online Protractor Tool still feels workable on tablets and mobile devices.
Workflow How to Use Online Protractor Tool
The easiest workflow is simple: add your image, line it up, place the protractor, add the measurement points, and export the result when everything looks clean.
01 Add an image
Upload a photo or diagram, drag in a file, or paste an image from your clipboard to start the workspace.
02 Align the background
Rotate or flip the image, adjust brightness and contrast, and use the grid to line up the edge you want to measure.
03 Place the protractor
Choose 180° or 360°, move the center into place, adjust the radius, and refine the rotation with Snap or quick angles.
04 Add measurement points
Click to create points, drag the red rays until they match the target edges, and review the point cards in the Measurements panel.
05 Export and reuse
Download PNG or PDF for sharing, or export CSV, Excel, or JSON if you want to reuse the measurement data elsewhere.
Keep learning from the next pages
Use Features for the full capability overview or open Help when you need support, browser notes, or troubleshooting answers.
Why choose it?
Why Do You Use Our Smart Protractor?
It keeps visual work visual
You stay on the image instead of guessing from memory. That is especially helpful when you need to discuss a corner with someone else.
It is faster than switching apps
The tool loads right in the browser, so you can move from screenshot to reading to export without a separate install.
It works for both learning and field notes
Students can check geometry homework, while engineers and makers can validate slopes, joints, and layout details.
It gives you something shareable
A screenshot plus auto-recorded points is easier to review than a message that only says the angle looked close enough.
It stays privacy-friendly
Measurements happen in your own browser session, so you can work quickly on internal screenshots or rough site photos.
FAQ
Frequently Asked Questions
Can I measure an angle on a photo with this tool?
Yes. Upload a photo or paste a screenshot, move the vertex to the corner point, and drag the point or edge until the ray matches the second side of the angle.
Does Online Protractor support reflex angles?
Yes. Switch to 360-degree mode whenever the angle wraps past a semicircle and you need the larger reading.
Can I use a live camera feed instead of a saved image?
Yes. The homepage tool includes a camera option so you can align the protractor directly on a live feed when browser permissions allow it.
What export formats are included?
You can download a PNG or PDF workspace export and send the measurement list out as CSV, Excel, or JSON.
How do I make the reading more consistent?
Place the center carefully, use the grid when edges are hard to judge, and switch snap steps on if you want more repeatable point placement.
Where should I go next after the homepage?
Check the Features page for workflow details, the Tutorial page for guided steps, and the Help page when you need support or system notes.